Thermocouple calibration might look like a small detail in your industrial processes. But here’s something you should know – type K thermocouples can drift more than 10°C after just a few hundred hours at high temperatures. This is a big deal as it means that your critical systems could fail catastrophically when they don’t get accurate temperature readings.
Your temperature readings can lose accuracy for several reasons. Mechanical shock, vibration, thermal cycling, and oxidizing environments cause thermocouples to drift over time. The drift becomes much worse at temperatures above 900°C. Thermocouples with proper configuration can work well for five to ten years in normal conditions. However, harsh environments make them deteriorate faster.
Our research shows that calibrating specific thermocouples can improve accuracy by up to 5 times compared to some manufacturer’s tolerances. This difference can reach up to 6°C. Understanding the right time and method to adjust thermocouples are the foundations of success across construction, energy and manufacturing industries.
In this piece, we’ll show you why your thermocouple calibration might be off and give you practical steps to fix these problems. This will help your temperature measurement systems deliver the accuracy your operations just need.
Common Reasons Thermocouple Calibration Goes Wrong
Measurement professionals face constant challenges in keeping thermocouples calibrated correctly. Thermocouples lose accuracy as time passes, even when installed properly. You can prevent measurement errors by knowing how these failures happen.
Drift due to mechanical or thermal stress
Thermocouples drift away from their original output signal. This happens because of mechanical shock, cold working, vibration, and thermal cycling. The wires face mechanical stress especially when vibration occurs, which can lead to insulation failure and short circuits.
The wire structure changes until voltage-temperature characteristics no longer match standards – a process called decalibration. This creates a big problem as readings look accurate but drift slowly. The performance changes over time because thermal expansion and contraction cycles create internal stress.
High-temperature degradation
Thermocouple drift speeds up at high temperatures (900°C and higher) when impurities move onto the thermocouple alloy conductors. Temperature readings drop and keep decreasing. This can lead to failure when readings are off by about 25°F from the original temperature.
Material structure changes add up as time passes – longer exposure means bigger effects. Each thermocouple type drifts differently. To name just one example, see sheathed Type N thermocouples that show drifts between -10 to -13°C at about 400°C. Aging thermocouples often show errors between 10-20°F.
Incorrect reference junction compensation
Reference junction compensation plays a key role in accurate thermocouple measurement. Calculated temperatures will be wrong if you don’t know or factor in the cold junction temperature correctly. Temperature changes near the reference junction can also cause wrong readings.
Big errors often happen when the cold junction sensor doesn’t reach ambient temperature. Thermocouples measure temperature differences rather than absolute temperature, so proper compensation needs to happen immediately.
Environmental contamination and corrosion
Environmental factors change how thermocouples perform. Contact with dirt, moisture, or chemicals changes their electrical properties. At high temperatures, corrosive substances like H2S react with metals, which leads to sulphidation and equipment failure.
Metal from the thermocouple sheath can leak into the internal alloys and hurt accuracy. You should check regularly for oxidation, corrosion, or mechanical damage to know which thermocouples need recalibration or replacement.
How to Identify a Faulty Thermocouple Calibration
Bad thermocouple calibration can get pricey and cause production problems if not caught early. Product defects, equipment failures, and major safety risks often result from wrong measurements. Let’s look at signs that show your thermocouple needs calibration.
Unexpected temperature fluctuations
Temperature readings that swing wildly point to calibration problems. Your calibration likely needs fixing when readings suddenly jump or drop by several degrees while actual temperature stays stable. Experience shows that touching thermocouple lead wires should not cause wild reading swings. If physical contact with wires makes temperature swing 20-30°F, you need to break down the issue right away.
The thermocouple might have an open circuit condition or a burn-out with direction set to “low” if readings drop to zero before returning to normal.
Mismatch with other sensors
You can check calibration accuracy by putting a new or known good thermocouple next to the one you suspect. Document any differences by comparing readings between both units. Calibration problems become obvious when similarly placed thermocouples show big differences in the same environment.
Out-of-spec readings during audits
Thermocouples without proper ID or traceability tend to fail inspection during audits. You must prove to regulators that your temperature measurements come from verified sensors. NIST traceable calibration certificates are the foundations of measurement traceability to national standards.
No recent calibration certificate
Calibration certificates prove your measurements are valid. Most thermocouples need yearly calibration according to industry standards. Units need more frequent calibration if exposed to harsh conditions or heavy use.
Yes, it is best to recalibrate thermocouples exposed to long high-temperature periods, harsh environments, thermal shock, or mechanical stress whenever their performance seems questionable—not just during scheduled maintenance.
Fixing Calibration Errors: Step-by-Step Guide
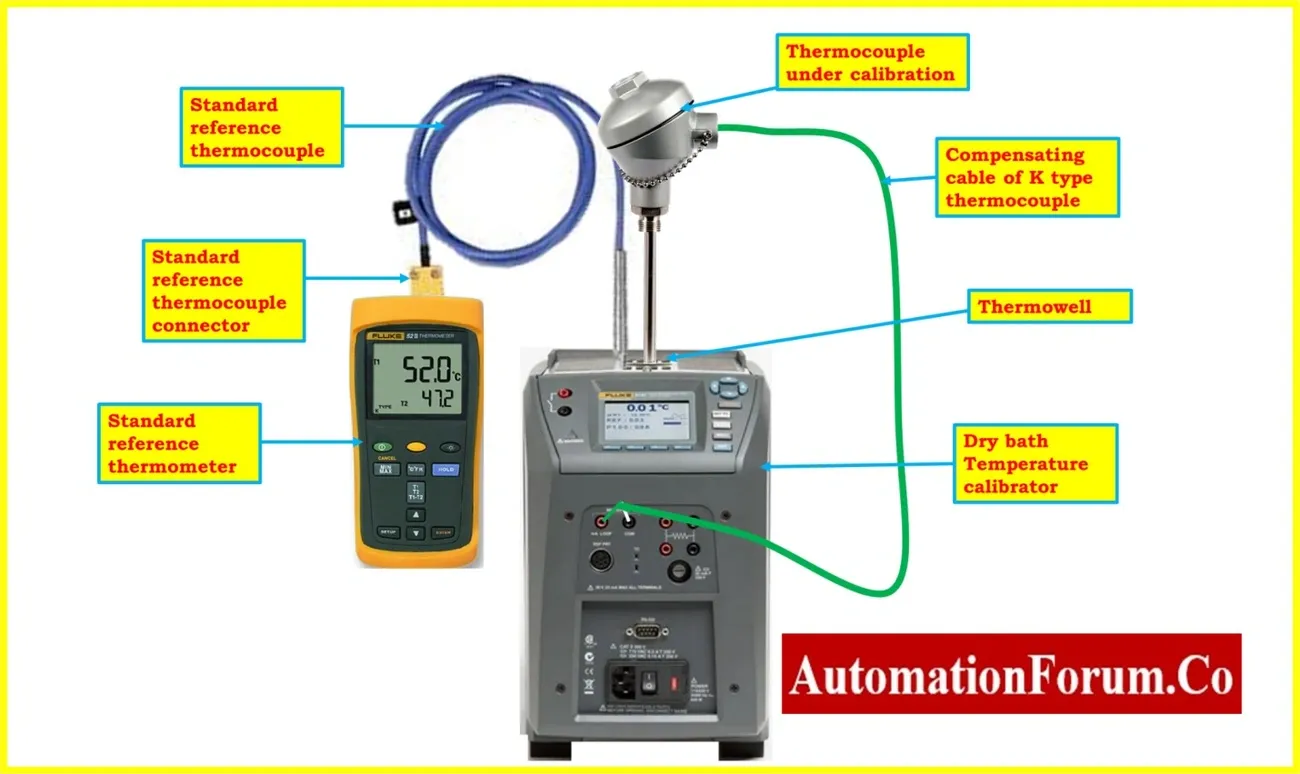
Image Source: AutomationForum
Quick action becomes essential after spotting adjustment issues. Proper calibration does more than meet regulations – it’s the foundation of accurate temperature measurement in industrial processes.
1. Verify calibration history and certificate
You should always check your thermocouple’s documentation first. Annual calibration is generally recommended for most thermocouples, though devices in constant use need more frequent checks. Review certificates to confirm if your thermocouple meets either “standard limits of error” or tighter “special limits of error” as specified by ASTM. Your thermocouples need recalibration if their performance becomes questionable or after exposure to unusual operating conditions.
2. Use proper thermocouple calibration equipment
The right calibration tools substantially affect accuracy. You’ll need these tools for precise calibration:
Dry block calibrators (for field calibration)
Fluid baths or furnaces (for laboratory settings)
Precision temperature measurement instruments
Calibrated reference sensors
The specialized equipment lets you test thermocouples throughout their operating temperature range.
3. Follow a standard thermocouple calibration procedure
A methodical approach among other tools ensures reliability:
Isolate the thermocouple from the process
Immerse it fully in your temperature source (dry-well/bath)
Connect to precision measurement instrument
Ensure proper reference junction compensation
Adjust temperature to each test point
Record readings at each stable temperature point
Each setpoint needs enough stabilization time before you record measurements.
4. Compare with a certified reference sensor
A calibrated Platinum Resistance Thermometer (PRT) serves as the industry’s standard reference sensor. Your working PRT should be certified through accredited laboratories with traceability to national standards like NIST. Both the reference sensor and your thermocouple should go in the same temperature source. The reading differences show your thermocouple’s error.
5. Document and label calibrated thermocouples
Documentation wraps up the calibration process. Your detailed records should include:
The thermocouple’s identification details
Calibration date and next due date
Reference standards used
Recorded readings at each test point
Calculated error values
Each calibrated thermocouple needs a label with its certificate number.
Choosing the Right Calibration Method for Your Application
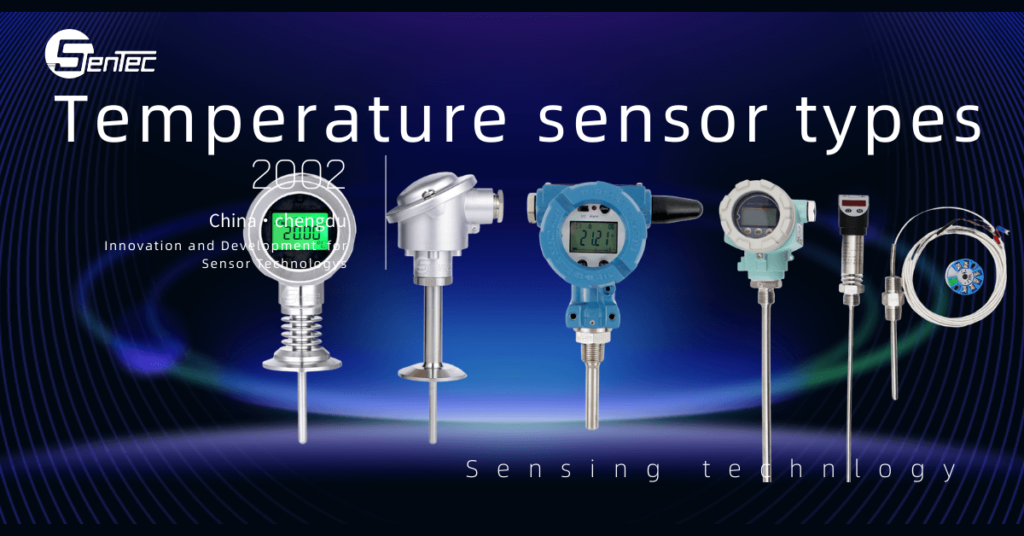
Your measurement accuracy depends on choosing the right calibration method. The best approach varies based on your application needs, temperature range and available resources.
Fixed-point calibration
Fixed-point calibration gives you the highest precision by comparing thermocouple readings against internationally accepted temperature points where substances change physical state. To name just one example, measuring EMF during tin’s phase transition (at 231.928°C per ITS-90) gives reference values that match standard charts. This method delivers excellent accuracy but needs specialized equipment and laboratory conditions.
Dry block calibrator method
Dry block calibrators are a great solution for field calibration without messy fluids. These devices come with pre-drilled metal inserts where you place thermocouple probes before heating or cooling them to specific temperatures. They heat faster (up to 100°C per minute) and stabilize within just 3 minutes. The right immersion depth remains crucial for accurate readings – you need 15 times the sensor’s diameter plus sensing element length.
Stirred bath or furnace method
Most laboratories use stirred baths or furnaces based on their temperature needs. These systems give excellent thermal contact and stability through even heating. Baths fit larger, odd-shaped sensors and are nowhere near as variable as dry blocks. They might not be as portable as dry blocks, but their stability makes them perfect for precision calibration work.
J type vs K type vs T type thermocouple calibration
Each thermocouple type needs specific calibration attention:
Type K (nickel-chromium/nickel-aluminum): Works from -200°C to 1260°C, works best in oxidizing or inert atmospheres, but sulfur can damage it
Type J (iron/constantan): Works from -210°C to 760°C, fits vacuum and reducing environments, but oxidizes above 540°C
Type T (copper/constantan): Works down to -200°C, resists moisture, and stays stable to 370°C in air
Thermocouple for oven calibration considerations
Oven calibration needs extra care for temperature uniformity and stability. You should place multiple sensors throughout the oven to spot temperature variations. Commercial ovens’ product quality can change substantially with just a few degrees of temperature difference. Quick calibration methods help avoid expensive downtime – small, portable calibrators that stabilize fast work best here.
Conclusion
Reliable industrial temperature measurement depends on proper thermocouple calibration. This piece showed how small calibration errors can cause temperature deviations to vary by a lot—sometimes more than 10°C after a few hundred hours of use. These errors affect product quality and equipment lifespan, which hurts your bottom line.
You need to spot warning signs of calibration drift to maintain accurate measurements. Unexpected temperature changes, differences between sensors, and readings that fail audits point to problems that need quick fixes. Thermocouples in harsh environments need more frequent calibration than those in normal conditions.
The right calibration follows clear steps. Check your calibration records first. Next, pick the right equipment for your thermocouple type. Then use standard procedures and allow enough time for stabilization. Compare your readings with certified reference sensors. Document everything carefully to stay compliant and traceable.
Your specific needs and accuracy requirements determine whether to use fixed-point, dry block, or stirred bath calibration. Fixed-point calibration gives the best precision but needs special lab conditions. Dry block calibrators work well in the field despite some thermal uniformity limits.
Thermocouples look simple but need careful calibration and technical know-how. The steps we covered will help reduce measurement uncertainty and make your temperature-dependent processes more reliable. Note that investing in regular, proper calibration costs less than dealing with process failures, rejected products, and damaged equipment.
Feel free to contact us today to talk to one of our industry engineer and get your questions answered.
FAQs
Q1. Why is thermocouple calibration necessary? Thermocouple calibration is essential to ensure accurate temperature measurements. Over time, factors like aging, environmental conditions, and mechanical stress can cause thermocouples to drift from their original calibration, leading to inaccurate readings. Regular calibration helps maintain measurement precision and compliance with industry standards.
Q2. What are common causes of thermocouple calibration errors? Common causes include mechanical or thermal stress, high-temperature degradation, incorrect reference junction compensation, and environmental contamination. These factors can lead to drift in thermocouple readings, potentially resulting in significant measurement errors over time.
Q3. How can I identify if my thermocouple calibration is faulty? Signs of faulty calibration include unexpected temperature fluctuations, mismatches with other sensors, out-of-spec readings during audits, and the absence of a recent calibration certificate. If you notice any of these issues, it’s time to investigate your thermocouple’s calibration.
Q4. What steps should I take to fix thermocouple calibration errors? To fix calibration errors, start by verifying the calibration history and certificate. Use proper calibration equipment, follow standard calibration procedures, compare readings with a certified reference sensor, and thoroughly document the process. Ensure you label calibrated thermocouples correctly after the procedure.
Q5. How do I choose the right calibration method for my thermocouple? The choice of calibration method depends on your specific application, required accuracy, and available resources. Options include fixed-point calibration for high precision, dry block calibrators for field use, and stirred baths or furnaces for laboratory settings. Consider factors like temperature range, thermocouple type, and environmental conditions when selecting a method.

