LoRa applications have transformed environmental monitoring by enabling communication across remarkable distances – several kilometers in urban areas and more in rural environments. LoRa technology stands as the leading wireless platform for Internet of Things (IoT). It lets us build adaptable networks of “always-on” sensors that work even in the most challenging and remote locations.
Environmental senosrs with lora application at measuring physical parameters like temperature, humidity, and gaseous elements such as CO and CO2. These systems run on minimal power consumption of just 25 mW and achieve transmission ranges of 1-5 kilometer. The combination of distance coverage and low power needs makes LoRa environmental solutions perfect for smart agriculture, environmental monitoring, and smart cities.
In this piece, you’ll learn how to build your own LoRa-powered environmental monitoring system. We’ll cover everything from component selection to deployment and ground applications. You’ll discover what you need to implement these powerful LoRa industrial applications in your environmental monitoring projects.
Why Use LoRa for Environmental Monitoring?
Picking the right communication protocol can make or break your environmental monitoring project. LoRa emerges as an excellent choice because it combines unique capabilities that solve specific challenges in environmental sensing applications.
Low power and long range advantages
LoRa technology’s most impressive feature is its battery efficiency. This makes them perfect for remote environmental monitoring stations where maintenance visits can get pricey and pose challenges. These devices need very low current (less than 50mA) during data transmission and reception. This extends their operational life substantially—reaching up to 10 years in some cases.
LoRa’s range capabilities set it apart from the competition. The technology’s signals can reach up to 20 kilometers in open rural areas while maintaining 5 kilometers of coverage in dense urban environments. High wireless link budgets of 155 dB to 170 dB help achieve this extended range.
The technology’s signal penetration allows it to work well in complex environments like multi-floor buildings or underground installations. This feature proves valuable for complete environmental monitoring systems that collect data from tough spots such as indoor air quality sensors or groundwater monitoring equipment.
Comparison with Wi-Fi, Zigbee, and NB-IoT
LoRa fills a vital gap in the IoT ecosystem compared to other wireless technologies:
LoRa vs. Wi-Fi: Wi-Fi needs high power and offers limited range. LoRa provides wide coverage with minimal energy use. It serves applications where Wi-Fi wouldn’t work due to power constraints or distance limitations.
LoRa vs. Zigbee: Both technologies are built for IoT applications. LoRa outperforms Zigbee substantially in range. Zigbee works best for short-range, in-building applications, while LoRa excels in wide-area deployments across urban or rural environments.
LoRa vs. NB-IoT: These technologies complement each other in the digital world. LoRa uses unlicensed spectrum, offering budget-friendly deployment and device costs. NB-IoT typically uses licensed cellular bands. Environmental monitoring projects with tight budgets often find LoRa more economical.
LoRa’s flexible data transmission capabilities make it ideal for environmental sensing. Data rates from 0.3 kbit/s to 50 kbit/s per channel match the modest bandwidth needs of environmental sensors while maximizing range and power efficiency.
LoRa Application Diagram overview
Building a working environmental monitoring system with LoRa technology needs compatible components that work well together. The right mix of hardware will give you the best performance—you need this for remote deployments.
Environmental monitoring systems working architecture
Sensor Layer: Environmental sensors (temperature, humidity, air quality etc.) connected to microcontrollers with LoRa transceivers
Gateway Layer: LoRa gateways receive wireless sensor data and send it to network servers
Network Server Layer: Software manages the LoRa network, handles device activation, and keeps data transmission secure
Application Layer: Cloud platforms store, analyze and show environmental data
LoRa protocol protects this system with end-to-end encryption using two session keys: network server key and device server key. These keys check transmission authenticity and stop eavesdropping or data tampering.
Your operational deployments must follow regional frequency rules. AWS IoT Core works with multiple bands like US902-928, EU863-870, AS923-1, and AU915. Local regulations from the LoRa Alliance must be followed.
Environmental sensor lora connection diagram example
There are too many solutions to makes the environmental sensor work by lora transmission. Here, we list 2 typical solutions for it.
Lora conneciton diagram example 1:

In this connection diagram, any of an RS485 sensor, like soil sensor, temperature& humidity sensor, wind sensor etc. can connect with an S95-DTU WIRELESS MODEM seperately to Collect and send data to a DTU lora receiver remotely, and then let the lora receiver transmit the all data to other industrial monitoring equipment, such as PLCs and computers to read and processe data.
In connection diagram example 1, an RS485 sensor connect with the Lora sender by cable wire, the lora sender and lora receiver communicated with each other by the Lora frequency, ususally, an lora receiver can communicate with around 32pcs lora sender. The lora receriver connect with the industrial monitoring equipment, such as computer through an communication cables.
In this solutions, it is very suitable for each sensors with long distance and have to connection one sender for each of sensors to upload the data.
Lora conneciton diagram example 2:

In this connection diagram, an RS485 sensor, like soil sensor, temperature& humidity sensor, wind sensor etc. will connection an RS485 Hub before connect with an S95-DTU WIRELESS MODEM lora sender. Then, a DTU lora receiver will used connect to an industrial monitoring equipment, such as PLCs and computers to read and processe data. The wireless modem lora sender and lora receiver communicated with lora frequency with wireless transmission distance up to 1-5km.
In connection diagram example 2,the RS485 sensors connect with the RS485 hub and lora sender by cable wires, the lora sender and lora receiver communicated with each other by the Lora frequency, ususally, an lora receiver can communicate with around 32pcs lora sender. The lora receriver connect with the industrial monitoring equipment, such as computer through an communication cables.
In this solutions, there used less Wireless modem like DTU, and it is more suitable for the sensors with closer distance, as they need collect by cable wire to the RS485 hub.
More deep knowledge to Building Your Sensor Node
Let’s build our environmental monitoring system now that we have our components ready. Building a working LoRa sensor node needs attention to detail. The process breaks down into simple steps that beginners can easily follow.
Wiring the LoRa module and sensors
The components need proper connections based on their communication protocols. Arduino-based setups follow a straightforward pattern:
The Dragino LoRa Shield attaches directly to your Arduino UNO board. The shield handles radio communication through SPI interface with the Arduino.
ESP32 setups with external SX1276/78 modules need these specific connections:
Connect MISO to GPIO 19
Connect MOSI to GPIO 23
Connect SCK to GPIO 18
Connect NSS to GPIO 5
Connect RESET to GPIO 14
Connect DIO0 to GPIO 2
The DHT11 temperature and humidity sensor connects to a digital pin (like pin 12) on your Arduino. You’ll need a 5kΩ pull-up resistor. The BME280 sensor uses I2C protocol and connects to pins 33 (SDA) and 25 (SCL) on an ESP32 with software I2C.
Important: Your LoRa module needs an antenna to operate. Running it without one could damage the device permanently.
Programming the microcontroller
The Arduino IDE is a user-friendly environment to code your sensor node.
Start by installing these libraries:
SPI library to communicate with the LoRa module
LoRa library to manage radio transmission
Sensor-specific libraries (DHT for temperature/humidity or Adafruit_BME280 for environmental measurements)
Your code should follow this structure:
#include <SPI.h>
#include <LoRa.h>
#include <Sensor_Library.h>

void setup() {
  // Initialize serial communication
  Serial.begin(115200);

  // Initialize LoRa module
  LoRa.setPins(SS, RST, DIO0);
  LoRa.begin(868E6);  // Set frequency (868MHz for Europe, 915MHz for North America)

  // Initialize sensors
  sensor.begin();
}

void loop() {
  // Read sensor data
  // Process data
  // Transmit data via LoRa
  // Sleep to conserve power
}
Integrating LoRa communication
LoRa communication setup needs two devices: a sender (sensor node) and a receiver (gateway).
The sender’s code should include:
LoRa radio initialization with region-specific frequency (868MHz for Europe, 915MHz for North America)
Spreading factor settings (SF7-SF12) that balance range and data rate
Properly formatted sensor data (usually strings with value delimiters)
LoRa.beginPacket(),LoRa.print(), andLoRa.endPacket()for data transmission
Battery life improves with deep sleep between transmissions:
esp_sleep_enable_timer_wakeup(60 * 1000 * 1000);  // Sleep for 1 minute
esp_deep_sleep_start();
Your signal strength shows in the RSSI (Received Signal Strength Indication) value. A value closer to zero means stronger signals.
Your environmental LoRa sensor node should now work properly. It senses environmental conditions and sends data wirelessly over long distances while using minimal power.
Deploying and Connecting to a LoRa Network
You’ve built your sensor node. The next significant step connects it to a larger network. This process changes individual sensors into a complete environmental monitoring system. The system transmits data over big distances to central platforms that analyze and show the results.
Setting up a LoRa gateway
Your gateway bridges environmental sensor lora devices with the internet. The hardware selection depends on where you’ll place it. Outdoor gateways come with resilient industrial-grade enclosures (IP67 rated) that work in harsh environments.
The gateway setup follows these steps:
Connect the gateway to power (many support Power over Ethernet)
Attach both LoRa and GPS antennas (never power up without antennas as this can damage the radio)
Configure network settings via the gateway’s web interface
Register your gateway with a LoRaWAN network server
The Things Network (TTN) is available for gateway registration beginners. Your gateway’s unique identifier (EUI) matches the LoRa module’s MAC address. TTN gives you connection credentials to add in your gateway settings.
Using LoRaWAN vs raw LoRa
Lora applications in iot need one of two approaches:
Raw LoRa lets devices talk directly using the physical LoRa radio layer. This simple approach has less overhead but lacks standard security and scaling features. It works best for simple point-to-point communications where you control both ends.
LoRaWAN builds on LoRa by adding network infrastructure and management features. The system adjusts communication settings based on device location and network conditions. This makes LoRaWAN perfect for large-scale deployments that need multiple gateway connections.
LoRaWAN protocol supports three device classes based on listening patterns and battery needs:
Class A: Most power-efficient, only listens for downlinks after transmitting
Class B: Scheduled listening windows, moderate power usage
Class C: Continuously listening, highest power consumption but lowest latency
Cloud platforms for data storage (ThingSpeak, AWS IoT)
Environmental monitoring needs good data storage and analysis tools. AWS IoT Core for LoRaWAN manages your network server without private infrastructure setup. Devices connect smoothly, gateways scale through LoRa Basics Station protocol, and everything links to other AWS services.
ThingSpeak gives you an open IoT data platform. It collects and shows immediate data through an Open API. Small deployments and academic projects work well with this platform’s straightforward LoRa environmental sensor integration.
Datacake gives you another choice with TTN webhook integration and custom environmental data dashboards. These platforms need you to:
Create an account on your chosen platform
Generate API keys for authentication
Configure integration on your LoRaWAN network server
Set up visualization dashboards for environmental parameters
Top 6 Real-World LoRa Environmental Applications
LoRa technology has evolved from theory into real-life environmental solutions. These systems now help solve pressing environmental challenges worldwide through innovative approaches.
Air quality monitoring in urban areas
Environmental agencies now use LoRa-powered air quality monitoring systems to track urban pollution levels. These networks gather data about particulate matter (PM2.5), carbon dioxide, sulfur dioxide, and nitrogen dioxide. Sensors combine multiple air quality indicators into single data packets and send them through LoRa shields to gateways. The gateways then update IoT servers with immediate information. These systems work amazingly well even in places without WiFi infrastructure and maintain stable RSSI values around -100 dBm.
Flood and rainfall detection systems
Ultrasonic sensors connected through LoRaWAN provide vital early warning alerts before floods hit. Studies show that LoRa-based flood monitoring wireless systems (FMWS) deliver immediate updates about water levels with adjustable warning thresholds (safe, alert, cautious, or dangerous). Solar-powered versions ensure these systems keep running in remote areas where infrastructure is limited. Multiple sensing units spread across catchment areas collect data that helps authorities plan better strategies for future flood events.
Radiation leak detection near power plants
Radiation monitoring is a vital safety application since almost three million Americans live within 10 miles of nuclear power plants. LoRa-powered radiation sensors constantly measure levels throughout facilities and nearby communities. These systems need minimal maintenance because their batteries last up to 10 years. The detection follows a simple process: radiation sensors collect data and send it to gateways, which forward it to servers for analysis. Facility managers receive instant alerts when readings go above safety thresholds.
Forest fire and deforestation alerts
LoRa mesh networks help detect forest fires early in remote areas that lack regular communication infrastructure. Tests in the field prove these systems can send data to gateways 500 meters away using optimal settings (BW 250 CR 4/5 SF 10). Advanced systems use multiple sensor nodes to monitor temperature, humidity, and gasses released during fires. Smart algorithms analyze this data to spot unusual patterns that might mean a fire has started, and they automatically alert authorities with exact locations.
Wildlife tracking and anti-poaching
Conservation groups use LoRa technology to shield endangered species from poachers. Rhinos in African wildlife reserves wear leg bracelets with LoRa-enabled trackers that send location data to strategically placed gateways. This creates Africa’s largest IoT network, covering 22 community-led reserves and four private reserves. Trackers run for up to seven years without needing SIM cards or expensive subscriptions. New collar designs also record animal sounds and movement patterns to help with research.
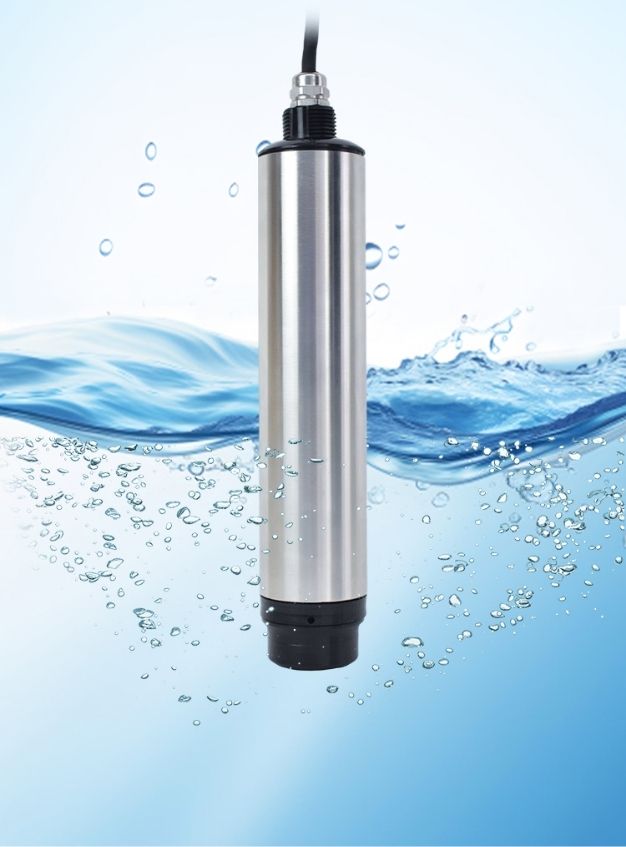
Soil and water quality monitoring
LoRa soil monitoring systems greatly benefit agriculture by tracking moisture, temperature, and electrical conductivity. Stainless steel probes last a long time when buried in soil. LoRa sensors check water quality by measuring pH, total dissolved solids, dissolved oxygen, and temperature. These systems connect different types of sensors to one hub, which allows monitoring of various soil layers or detailed water quality checks across watersheds.
Conclusion
LoRa technology has without doubt transformed how we monitor the environment through its unique mix of long-range communication and low power needs. This piece explores how these systems can work for years on a single battery. They transmit data across vast distances, even in tough terrains where regular connectivity options don’t work.
Building your own environmental sensor with LoRa might seem overwhelming at first. Our step-by-step approach makes this process available to beginners. The right mix of components creates reliable monitoring systems that need minimal upkeep.
Of course, LoRa’s true strength shows when individual sensors link up to form complete networks. These systems deliver crucial insights while using very little power. They track air quality in cities, monitor soil conditions on farms, and warn about natural disasters early.
LoRa strikes the perfect balance between range, power efficiency, and cost. This technology lets us put sensors in places we couldn’t reach before. The data we gather supports conservation work, makes public areas safer, and helps us learn about environmental shifts.
The future looks bright as LoRa networks grow worldwide. This growth creates new ways to monitor our environment more thoroughly. We’ve covered the basics here, but LoRa’s flexibility offers endless options to customize based on your needs. You now know how to build, set up, and fine-tune your own LoRa environmental sensors. This knowledge expands our shared ability to watch over and protect our environment.